Crochet Round Rug
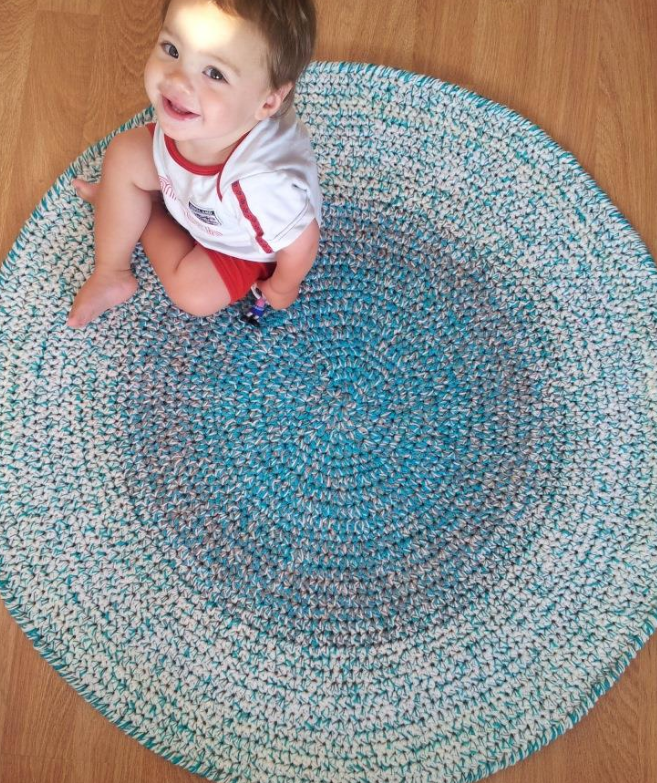
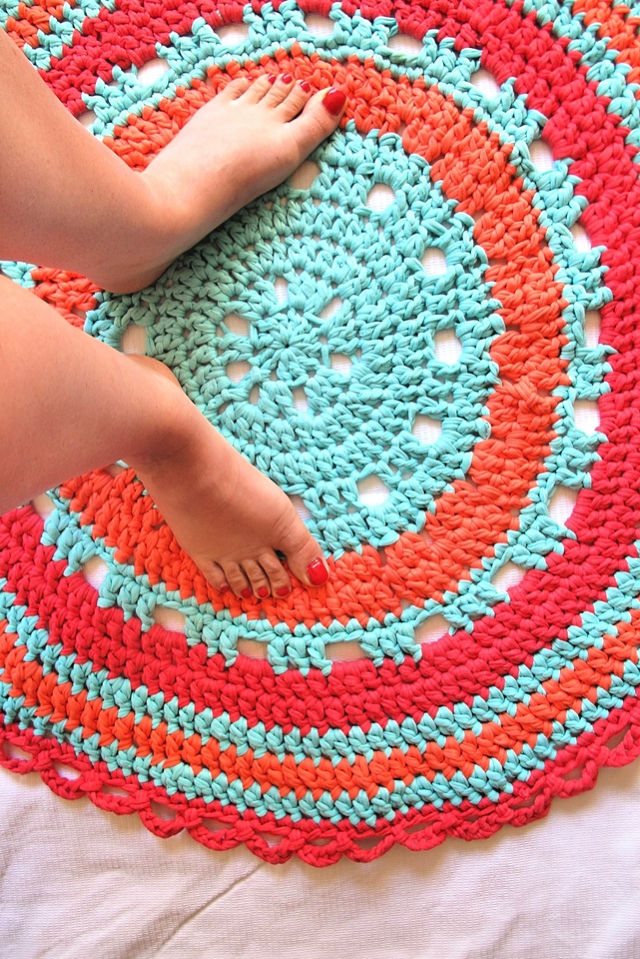
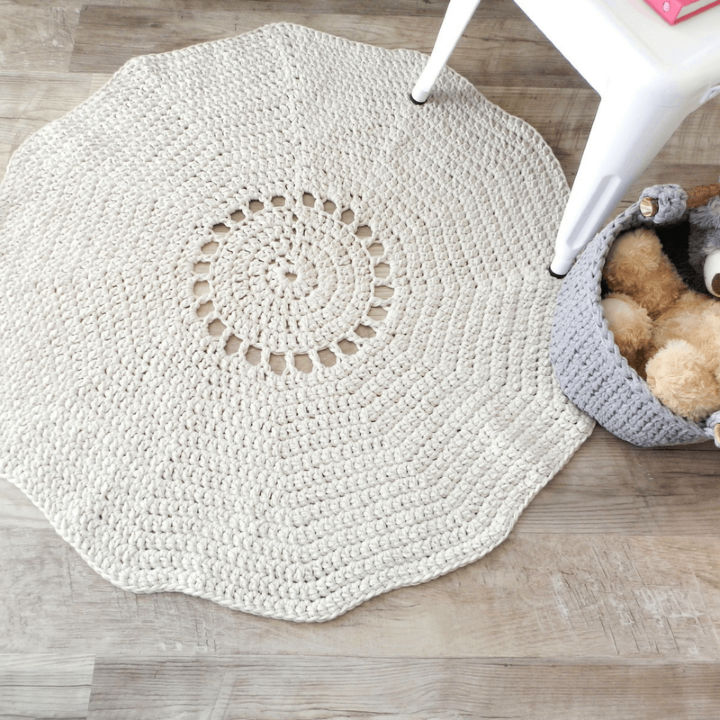
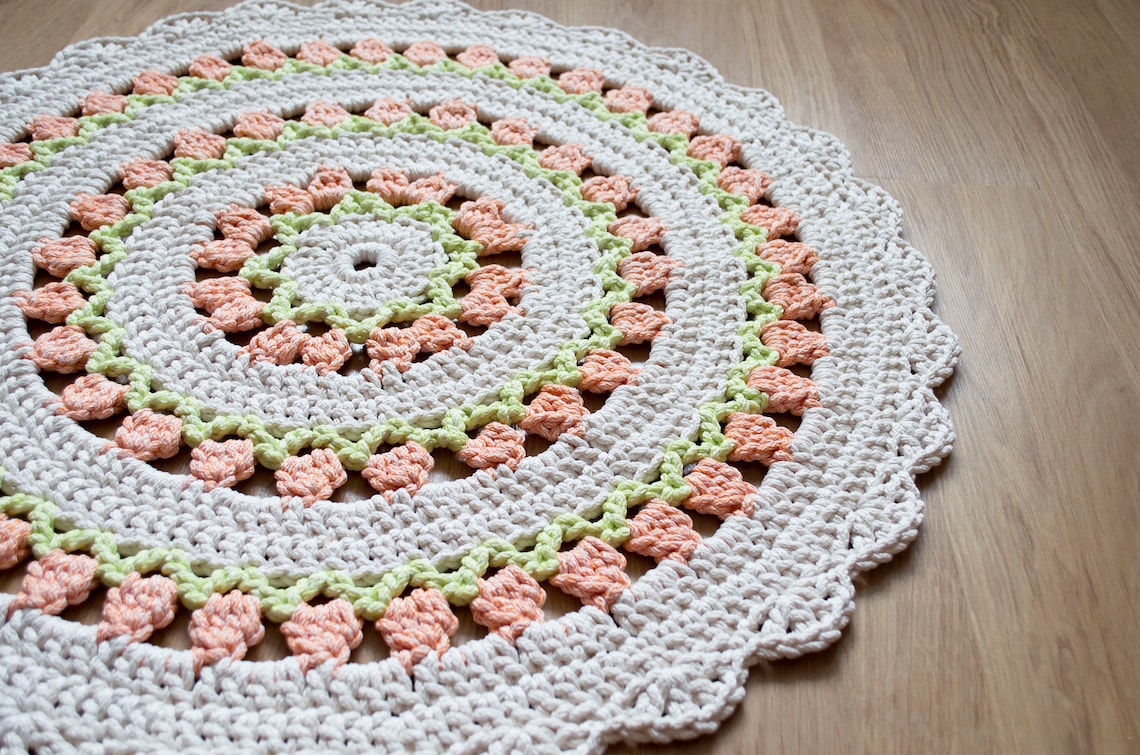
Crochet Round Rug - Number of stitches in round 1: After you’ve finished the crochet rug pattern, use the tapestry needle to sew in the ends. Maybe this round rag rug will be your next project?like the idea of fringe on crochet. Web as the crochet round rug grew, my arms became a little achy as there were so many stitches to get through on those last few rounds. 4 ch (counts as first dc + 1 ch), *1 dc blo in next st, 1 ch; Best crochet round rug ever crocheted. Number of stitches in round 1: You need a 15mm hook size for this pattern. Repeat from * to end of. Web the best pattern on the market to create a perfect round rug. Web the crochet round rug is a great beginner friendly crochet pattern. Web crochet home decor sends the message that your place is not just a house but a home. You need a 15mm hook size for this pattern. Honestly, this crochet round rug pattern looks magical. 4 ch (counts as first dc + 1 ch), *1 dc blo in next st, 1 ch; This giant crochet rug features an array of colors coming as round stripes. Round crochet rug main pattern. Ch 3, [1 dc in each of the next 17 sts, 2 dc in the next st] repeat around, sl st to join (228sts) the finished size of the round crochet rug is 38″ wide. It might be a fantastic addition to a kids bedroom or playroom. The end result is a lacy rug, round in shape, that can be made in any color. Web the best pattern on the market to create a perfect round rug. Sc 2 times in each st (place stitch marker in first st), do not join to the start of the round, simply continue working the next round in a spiral [12] round 3: Web the crochet round rug is a great crochet pattern to decorate your home.. Web crochet home decor sends the message that your place is not just a house but a home. A guide, which will step and a lot of information to help you out and not get lost. Number of stitches in round 1: You will not regret making this. Web #rug #howtocrochet #crochetforbeginners welcome to my channel, where i'll share an. *sc 2 times in next st (move stitch marker to the first st), sc in next st; Number of stitches in round 1: Web ever wondered how to make a huge, awesome rug that feels like clouds beneath your feet? Finish this round crochet circle with wavy edging. Web crochet home decor sends the message that your place is not. What a great way to upcycle clothes that don’t fit or have holes! Web #rug #howtocrochet #crochetforbeginners welcome to my channel, where i'll share an exciting new crochet tutorial on creating a round blanket for the floor. Web the skill required to crochet this circle rug is the crochet mandala that you can crochet nicely by making first the magic. Web the crochet round rug is a great crochet pattern to decorate your home. Web #rug #howtocrochet #crochetforbeginners welcome to my channel, where i'll share an exciting new crochet tutorial on creating a round blanket for the floor. Using c1, make a magic circle, sc 6 times into center of circle and pull tail to close [6] round 2: Old. Any yarn can be used to create the pattern. But if you want an especially easy one to follow, that looks beautiful and far more complicated than what it actually is, then this pattern by 1 hobby 1 is the answer! Number of stitches in round 1: You can keep adding rounds by following the increase pattern to make a. Web crochet home decor sends the message that your place is not just a house but a home. This giant crochet rug features an array of colors coming as round stripes. Web crochet a rug in just a couple of hours using the hand crochet technique! It feels awesome on bare feet, it’s a great way to add some texture. 4 ch (counts as first dc + 1 ch), *1 dc blo in next st, 1 ch; 3 ch (counts as first st), 15 dc into mc, sl st to top of beg 3 ch. Repeat from * to end of. Web round rug crochet pattern. Web the crochet round rug is a great beginner friendly crochet pattern. It might be a fantastic addition to a kids bedroom or playroom. From jersey cotton fabric yarn to wool, this beautiful crochet rug pattern uses simple stitches to build a beautiful, personal product for your home. Old clothes or fabric remnants are good choices of materials. Repeat from * to end of. Using c1, make a magic circle, sc 6. Sc 2 times in each st (place stitch marker in first st), do not join to the start of the round, simply continue working the next round in a spiral [12] round 3: Round crochet rug main pattern. A guide, which will step and a lot of information to help you out and not get lost. Web the crochet round. Watch this detailed tutorial for beginners and learn how to make your own round crochet carpet with simple. Web #rug #howtocrochet #crochetforbeginners welcome to my channel, where i'll share an exciting new crochet tutorial on creating a round blanket for the floor. This giant crochet rug features an array of colors coming as round stripes. It might be a fantastic addition to a kids bedroom or playroom. Web it’s hard to tell from this gorgeous picture, but yes, this is actually crocheted using a round crochet rug pattern! With the use of some basic crochet stitches, simple increases and a repeating pattern you’ll easily crochet a circle rug.crocheting circle rugs can be so much fun and the great thing is that it’s easy. It feels awesome on bare feet, it’s a great way to add some texture to small spaces, and it a super easy pattern. A guide, which will step and a lot of information to help you out and not get lost. Maybe this round rag rug will be your next project?like the idea of fringe on crochet. But if you want an especially easy one to follow, that looks beautiful and far more complicated than what it actually is, then this pattern by 1 hobby 1 is the answer! By using this instructional how to crochet a round rug, you will be on the path towards a personal, welcoming home where you will get to enjoy your space just the way you like it—because, after all, it was crafted by you. Web crochet 2 skeins of lion brand’s fettuccini yarn in solid and assorted colors or 110yds of fabric yarn to whip up this adorable crochet round rug. Number of stitches in round 1: 4 ch (counts as first dc + 1 ch), *1 dc blo in next st, 1 ch; Web the skill required to crochet this circle rug is the crochet mandala that you can crochet nicely by making first the magic ring. You can keep the circle going you can continue the pattern, adding 12 extra dc stitches in every alternate round (by working one more stitch between stitches) and altering the position of the first increase.
Easy Granny Rug Round Crochet Pattern for Beginners Maggie's Crochet
How to Crochet a Round Rug
15 Free Crochet Round Rug Patterns Crochet Circle Rug Pattern

Easy Granny Rug Round Crochet Pattern for Beginners Maggie's Crochet
15 Free Crochet Round Rug Patterns Crochet Circle Rug Pattern
Crocheted round rug Crochet Doily Rug Pattern Rustic Etsy

Free Crochet Round Rug Pattern Easy Home Decor Pattern
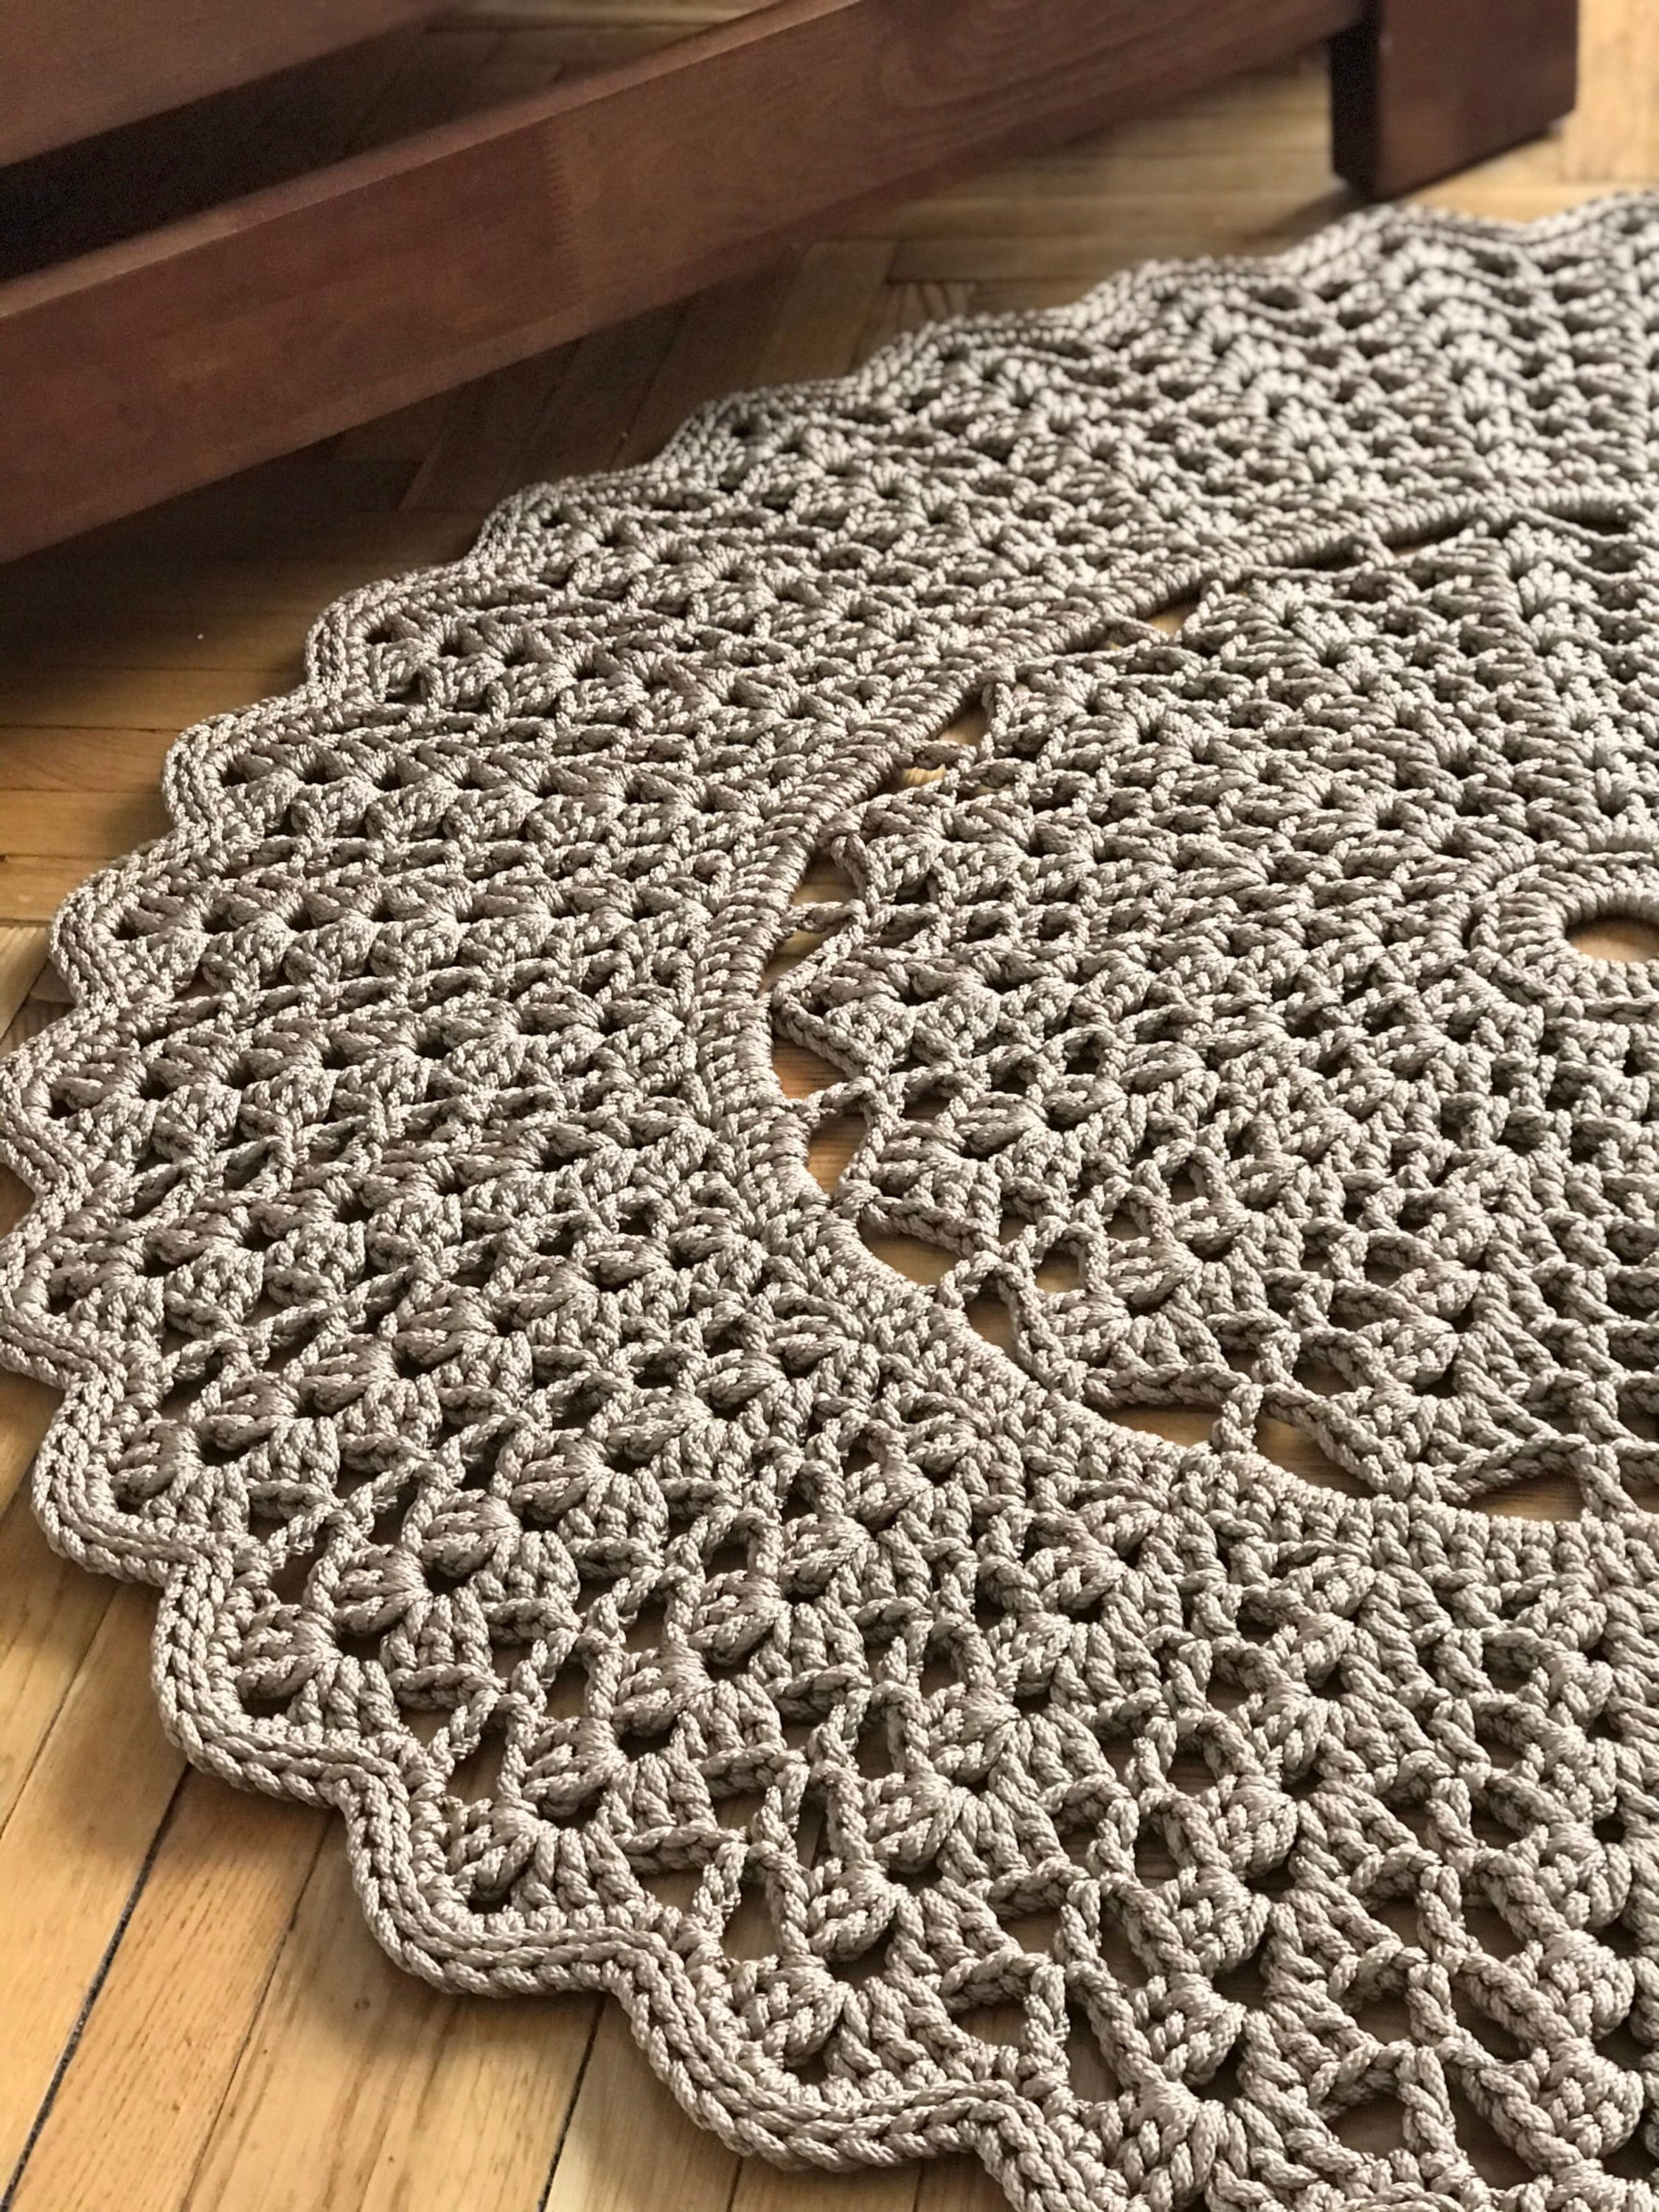
Round Crocheted Rug polyester cord Big crochet doily rug chic Etsy

Crochet Round Rug
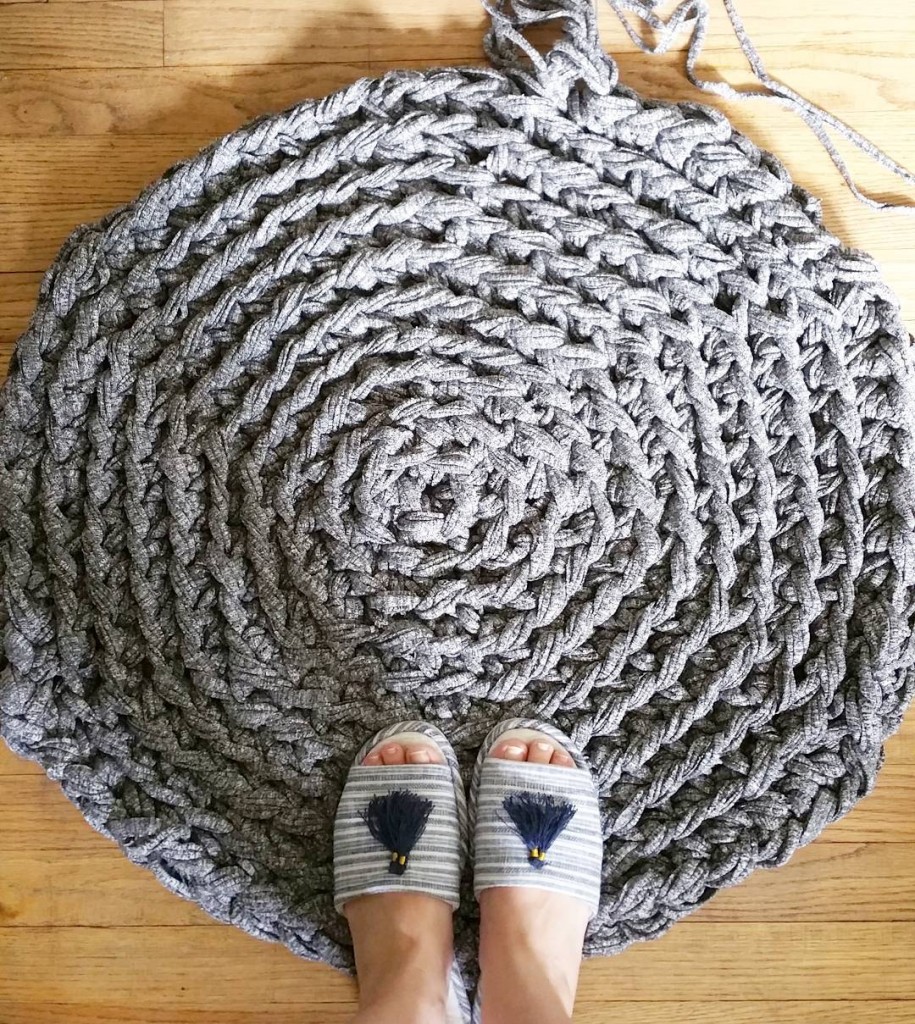
How to Hand Crochet a Circular Rug
You Will Not Regret Making This.
It's Easy, It's Fun & Will Assure Your Rug Always Lays Flat And Will Be Perfectl.
Finish This Round Crochet Circle With Wavy Edging.
The Pattern Repeats Easily And You Can Use It As A Base To Crochet Other Round Rugs In Other Colors And.
Related Post: